
As an Amazon Associate I earn from qualifying purchases.
You are sewing along, you flip the fabric over, and there it is: little dots or loops of bobbin thread poking up through to the top of your seam. The stitch looks fine from the underside, but the top is peppered with the wrong color thread. It is one of the most common sewing machine complaints, and the fix is almost always simple.
Here is the key insight that solves most tension mysteries: the thread you see misbehaving is rarely the thread at fault. When bobbin thread shows on top, the culprit is almost always the top thread, either tensioned too tightly or not seated in the tension discs at all. The top thread is yanking the bobbin thread up through the fabric instead of letting the two threads lock in the middle of the fabric layers.
Work through the diagnosis order below before you touch the bobbin case. Nine times out of ten, the problem is fixed by step two.
TL;DR: Bobbin thread showing on top means the top thread is pulling too hard. First, rethread the top thread completely with the presser foot UP so it seats in the tension discs. Second, check that the bobbin is inserted correctly with the thread unwinding in the right direction and clicked under its tension spring. Third, lower the top tension gradually while testing on a scrap. Only then consider the needle, lint under the bobbin, or mismatched thread weights. Do not adjust the bobbin case screw until every top-thread cause is ruled out.
The Golden Rule of Tension Problems
Memorize this, because it diagnoses half of all sewing machine issues: a problem visible on the bottom of the fabric is caused by the top thread, and a problem visible on the top is caused by… the top thread too, most of the time. More precisely, bobbin thread pulled to the top means top tension is too tight relative to bobbin tension. The top thread wins the tug-of-war and drags the bobbin thread up through the fabric.
This is why experienced sewists rethread the top first for almost every stitch problem. It is also why you should leave the bobbin tension screw alone. That tiny screw is factory-set, it drifts rarely, and well-meaning adjustments to it cause more problems than they solve.
Step 1: Rethread the Top Thread (Presser Foot UP)
Do this first, fully, even if you are sure the machine is threaded correctly. Unthread the machine completely and thread it again from the spool, following every guide.
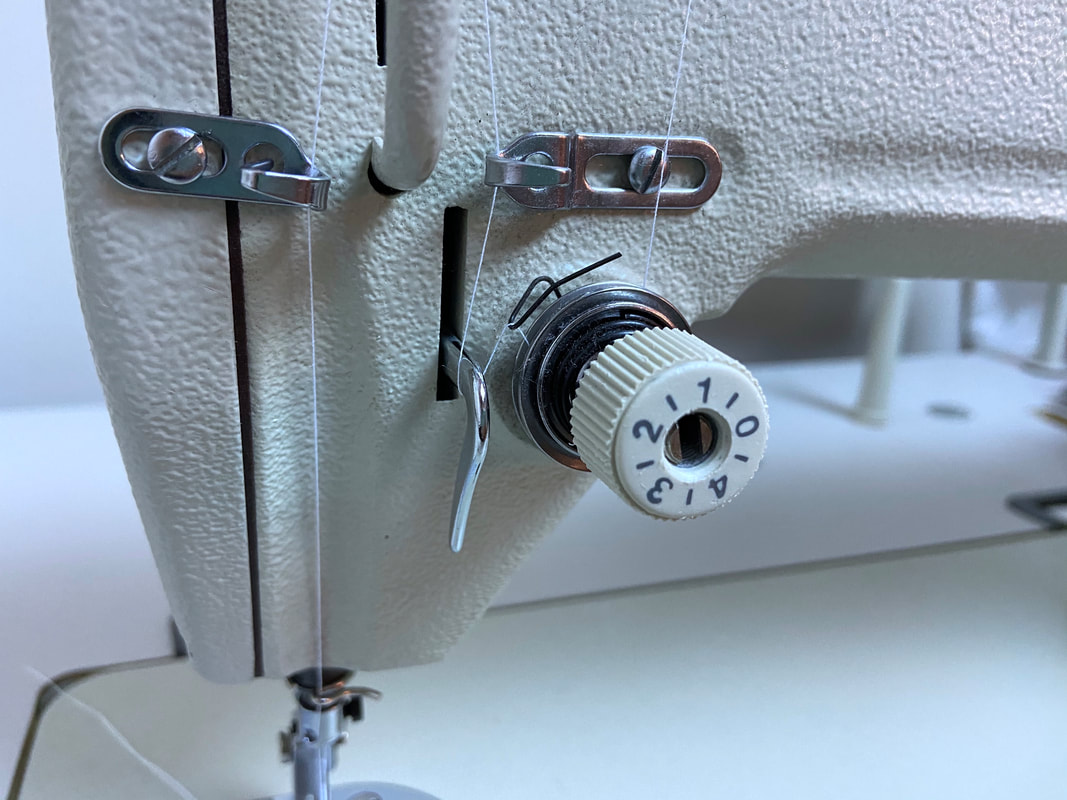
The critical detail: the presser foot must be UP while you thread. With the foot up, the tension discs open and the thread drops fully between them. Thread with the foot down and the thread rides on top of closed discs, giving you effectively zero top tension control, and the machine behaves as if the tension dial is broken. Sewing teachers report this single mistake accounts for a huge share of all tension complaints.
After threading, lower the foot and give the thread a gentle tug near the needle. You should feel firm, even resistance. If it pulls through with no resistance, it is not in the discs. Raise the foot and thread again.
Retest on a scrap of your project fabric, doubled as your seam will be. If the bobbin thread no longer shows, you are done. This step alone fixes the problem most of the time.
Step 2: Check the Bobbin
If rethreading did not fix it, inspect the bobbin. This takes thirty seconds.
Unwinding direction. Remove the bobbin and check that the thread unwinds in the direction your manual specifies. On most drop-in (top-loading) bobbins, the thread should unwind counterclockwise, forming a “P” shape when you hold the bobbin up. On front-loading machines, follow the manual’s diagram. A bobbin unwinding the wrong way feeds thread inconsistently and mimics a tension problem.
Seated under the tension spring. On drop-in bobbins, the thread tail must click under the small tension spring in the bobbin case. Pull the tail gently; you should feel light, even resistance. If the thread pulls freely with no resistance, it missed the spring. Reseat it.
Bobbin wound properly. A loosely or unevenly wound bobbin feeds thread in surges. If the bobbin looks lumpy, lopsided, or wound at varying speeds, toss that winding and rewind it smoothly at a medium, steady speed. Also confirm you are using the correct bobbin class for your machine (Class 15 and Class 66 are not interchangeable, and the wrong bobbin sits at the wrong height).
Step 3: Lower the Top Tension
If the machine is threaded correctly and the bobbin is correct, the top tension is genuinely too tight. Lower it gradually: move the dial down by half a number (for example, from 4 to 3.5), sew a test line on a doubled scrap, and inspect. Repeat until the bobbin thread stops showing on top and the threads lock in the middle of the fabric.
How do you know the lock point is right? Pull the test seam apart gently and look at the fabric edge in cross-section, or simply check that neither thread shows on the opposite side. On a balanced stitch, you see top thread on top and bobbin thread underneath, with the interlock hidden inside the fabric layers.
Note the number that works for this fabric and thread combination. Different fabrics need different settings; there is no universal correct tension number.
Step 4: Check the Needle
A damaged or wrong needle can drag thread and mimic tension issues.
Is it bent or dull? Remove the needle and roll it on a flat surface, or just replace it. Needles are cheap and dull needles cause an outsized share of stitch problems. If you cannot remember when you last changed it, change it now.
Is it fully inserted? The needle must be pushed all the way up into the clamp with the flat side facing the correct direction (usually back). A needle sitting even slightly low changes the timing of the stitch formation.
Is it the right size and type? Too fine a needle for heavy fabric, or a universal needle on knit fabric, can distort stitches. Match the needle to the fabric: ballpoint or stretch for knits, sharp or universal for wovens, denim needles for heavy layers.
Step 5: Clean Under the Bobbin
Lint is the silent tension killer. Thread lint and fabric dust pack under the bobbin case and around the feed dogs, gradually changing how thread feeds. Remove the bobbin case and the needle plate, and clean everything with the small brush that came with your machine. Do not blow into the machine with your mouth; moisture is bad for the mechanism. A can of compressed air used carefully, or better, the brush plus tweezers, does the job.
Owners report that machines which “suddenly” develop tension problems after months of fine sewing are usually just dirty. A two-minute cleaning fixes what looks like a mechanical failure.
Step 6: Check for Thread Mismatch
If you are using very different threads top and bobbin, for example heavy topstitching thread on top and fine bobbin thread below, the heavier thread dominates and pulls the lighter one out of position. For standard sewing, use the same thread type and weight in both. Specialty combinations can work, but they need deliberate tension adjustments and testing, not default settings.
Also check that the top thread is not catching on anything: the spool pin, a rough spot on the spool itself, or a thread guide it missed. Any snag acts like extra tension.
When It Really Is the Bobbin Tension
Almost never. But if you have worked through every step above on multiple fabrics with fresh needles and clean thread paths, and the bobbin thread still pulls to the top even at very low top-tension settings, the bobbin case tension may genuinely be too loose. This sometimes happens after the case has been dropped or the spring has weakened with age.
The bobbin tension screw is tiny and sensitive: a quarter-turn is a large adjustment. Mark its starting position with a marker before touching it, turn it in tiny increments, and test after each. Better yet, have a sewing machine technician check it during a service. An unnecessary bobbin adjustment creates a problem that is much harder to diagnose than the one you started with.
Common Mistakes to Avoid
Adjusting the bobbin screw first. It is the last resort, not the first step. Top-thread causes are overwhelmingly more common.
Threading with the presser foot down. The thread never enters the tension discs. Rethread with the foot up.
Testing on a single layer of different fabric. Tension behaves differently on different fabrics and layer counts. Always test on a doubled scrap of the actual project fabric.
Changing three things at once. Adjust one variable, test, then move on. Changing tension, needle, and thread simultaneously teaches you nothing about which one mattered.
Using the wrong bobbin. Class 15 bobbins in a Class 66 machine (or vice versa) sit wrong and feed wrong. Use only the bobbin type your manual specifies.
Ignoring lint buildup. Clean under the bobbin case regularly. Lint changes thread feed gradually enough that you blame the tension dial.
FAQs
Why is my bobbin thread showing on top all of a sudden?
The most common sudden causes are the top thread slipping out of the tension discs (rethread with the presser foot up), a newly bent or dull needle, or lint buildup under the bobbin case. All three are quick fixes.
Should I tighten or loosen the top tension when bobbin thread shows on top?
Loosen it. Bobbin thread on top means the top thread is pulling too hard and dragging the bobbin thread upward. Lower the top tension dial gradually until the threads lock in the middle of the fabric.
Can the wrong bobbin cause this?
Yes. The wrong bobbin class sits at the wrong height and feeds inconsistently, which looks like a tension problem. Use only the bobbin type specified in your manual, and check that the thread unwinds in the correct direction.
Does thread brand matter for tension?
Old, cheap, or inconsistent thread can cause tension-like symptoms because it feeds unevenly. You do not need the most expensive thread, but fresh, decent-quality all-purpose thread eliminates a variable. And use the same thread top and bobbin for standard sewing.
My machine was just serviced and now the bobbin thread shows. What happened?
The technician may have set the tensions to a generic default that does not suit your usual fabric, or the top thread is not fully seated after reassembly. Rethread carefully with the foot up and dial the top tension to suit your fabric before assuming anything is wrong.
Is it ever normal to see bobbin thread on top?
Briefly, at the very start of a seam before the tension stabilizes, which is why you hold thread tails when starting. If it continues beyond the first few stitches, something needs fixing.